
 en
en
Shadow Fiend Dota 2 Guide: Best Build, Abilities, Talents, Strategies, and Lore

13 Jul, 2026, 03:23
|Last updated: 13 Jul, 2026, 03:23
Shadow Fiend is one of the most explosive core heroes in Dota 2. He scales through souls, gains massive damage, and can wipe teams with a well-timed ultimate.
At the same time, he is fragile and unforgiving. One mistake can cost him stacks and momentum. This guide explains how Shadow Fiend works, how his abilities scale, and how to play him efficiently.
Shadow Fiend Lore and Identity
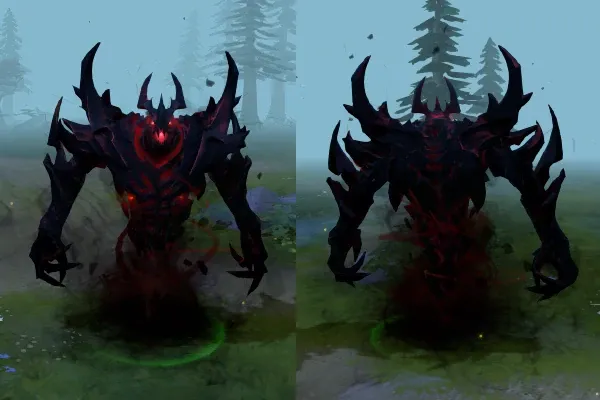
Nevermore, known as Shadow Fiend, collects the souls of those he kills. Poets, priests, heroes, criminals—no soul escapes him. What he does with them remains unknown.
In gameplay, this theme defines him. Every kill grants a soul. Every soul increases his power. His ultimate releases those captured souls in a devastating Requiem of Souls.
He is a ranged carry who grows stronger with each last hit. If he dies, he loses part of that stored power. This risk-reward design shapes how he must be played.
Abilities Breakdown
Necromastery (Innate)
Necromastery is the core of Shadow Fiend’s scaling. Each unit he kills grants a soul. Each soul gives bonus attack damage. At max level, he can store up to 20 souls, and more with a selected talent. Each soul grants up to 4 bonus damage per stack at max level.
With maximum stacks, he gains significant flat damage. When he dies, he loses 30% of his souls, rounded down. He always keeps at least one stack. This makes death extremely costly.
Shadowraze (Near / Medium / Far)
Shadow Fiend has three Shadowraze spells. Each hits a different distance in front of him: 200, 450, and 700 range. All three deal magical damage in a 250 radius. They apply a stacking debuff. Each stack increases the damage of the next Shadowraze.
At max level, a single raze deals up to 2800 base damage. Each stack adds up to 80 bonus damage. If all three razes hit the same target in sequence, the total damage becomes very high before reductions.
The first raze does not benefit from its own stack. Damage increases only from previous hits. The Aghanim's Shard upgrade adds a stacking movement speed debuff when damaging an enemy unit, as well as a flat cooldown reduction for all Shadowrazes. The debuff lasts 8 seconds and can stack without limit.
These spells allow Shadow Fiend to dominate lane. He can secure last hits, harass opponents, and clear stacks quickly. With the appropriate talent, Shadowraze also performs instant attacks on affected enemies. These attacks can trigger attack modifiers and ignore disarm.
Feast of Souls
Feast of Souls grants Shadow Fiend bonus movement speed and attack speed for 8 seconds. During this duration, Shadow Fiend collects souls every 0.5 seconds from 2 enemies in a 600 radius.
When Feast of Souls ends, Shadow Fiend loses all bonus gained souls whose owners are still alive immediately. The souls of any enemies slain during the duration of Feast of Souls is retained for another 8 seconds, after which all souls over the Necromastery max stack count are also lost.
Presence of the Dark Lord
Presence of the Dark Lord is a passive that reduces the armor of enemies in a 1200 radius. It pierces debuff immunity. At max level, it reduces armor by 7. When enemy heroes die nearby, the armor reduction increases by 2 for 20 seconds.
This aura makes Shadow Fiend and his team deal more physical damage. It also stacks with armor reduction items like Desolator and Assault Cuirass. The aura does not affect enemies who lack vision of Shadow Fiend.
Requiem of Souls (Ultimate)
Requiem of Souls is Shadow Fiend’s ultimate. He releases one line of energy for each soul stored through Necromastery. Each line deals magical damage and applies fear, movement slow, and magic resistance reduction. The more souls he has, the more lines are released. Each line deals up to 160 damage at max level. If multiple lines hit a target, the damage stacks.
Fear duration increases per line hit, up to a cap. Enemies run away from Shadow Fiend when feared. If he dies, Requiem automatically triggers, even if it is on cooldown. Before this passive cast, he loses 30% of his souls. The death version does not apply fear but still slows.
With Aghanim’s Scepter, the lines return to Shadow Fiend after expanding. The returning lines heals him for all damage dealt. This upgrade increases total damage potential and survivability. Requiem requires careful positioning due to its long cast animation. Items like Blink Dagger, Arcane Blink, or Eul’s Scepter help secure full impact.
Shadow Fiend Playstyle
Shadow Fiend is a ranged agility core who farms quickly and scales into high physical damage. Early on, he relies on magic burst from Shadowraze. Later, he transitions into a heavy right-click damage dealer.
He has no built-in escape. Good positioning is essential. He needs vision, timing, and item support to function in fights.
His strengths include:
-
Gains attack damage from kills
-
Farms waves and jungle camps fast
-
Strong early magic burst and strong late physical damage
-
High armor reduction aura
His weaknesses are clear. He loses damage when he dies. He has no mobility spell. His starting damage is low before collecting souls.
Itemization Strategy

Shadow Fiend’s items support three goals: farming speed, positioning, and survivability.
Starting items focus on regeneration and last hitting. Slippers of Agility help offset low starting damage. Clarity allows frequent Shadowrazes. Early game items often include Bottle for rune control and sustain. Infused Raindrops help with mana and magic resistance.
Mid game choices define his role. Power Treads increase damage and flexibility. Shadow Blade provides mobility and initiation. Dragon Lance improves range and stats. Later, Black King Bar becomes critical to avoid interruptions during Requiem. Hurricane Pike upgrades Dragon Lance and improves positioning.
Damage items scale well due to his high base damage from souls. Daedalus increases critical output. Butterfly improves survivability and agility scaling. Armor reduction items work especially well. Desolator combined with Presence of the Dark Lord greatly lowers enemy armor. Assault Cuirass amplifies team damage and stacks with his aura.
Aghanim’s Scepter strengthens both Shadowraze and Requiem. Aghanim’s Shard adds a fear-based critical strike mechanic to his attacks. Blink Dagger or Arcane Blink improves initiation timing. Eul’s Scepter sets up guaranteed Requiem when timed correctly.
Laning Phase Tips
Early Game Impact
Shadow Fiend’s early game revolves around stacking Necromastery. Use Shadowraze to secure ranged creeps. Each last hit increases your attack damage, making future last hits easier. Position carefully. Without souls, your base damage is low. Avoid unnecessary trades before building stacks. Once you reach high soul count, you can pressure the opponent with triple raze combos.
Mid Game Impact
At this stage, Shadow Fiend farms quickly and pushes waves with Shadowraze. He can join fights once he has mobility and Black King Bar. A well-positioned Requiem can decide engagements. Presence of the Dark Lord helps your team take towers faster. Armor reduction accelerates objectives. Dying during this phase is costly. Protect your soul count by playing behind vision and teammates.
Late Game Scaling
In late game fights, Shadow Fiend becomes a high physical damage core. His aura and items reduce armor heavily. His attacks hit hard due to stacked souls and agility scaling. Requiem remains relevant for fear and burst. With Aghanim’s Scepter, it also provides sustain during extended fights. Positioning remains critical. He lacks escape tools. If caught without protection, he loses momentum quickly.
Key Takeaways for Playing Shadow Fiend
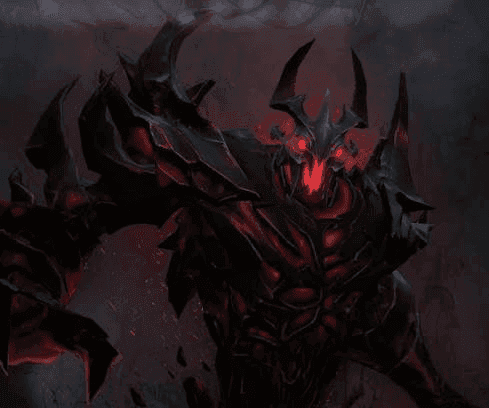
Shadow Fiend rewards precision in Dota 2. Stack souls early. Protect them mid game. Convert them into physical dominance late game. Mastering raze timing, understanding soul management, and choosing correct items are the core skills. When played correctly, Shadow Fiend controls fights through damage, fear, and armor reduction — each kill fueling the next.
Follow Strafe Esports for the latest Dota 2 news, and our X account for the latest content and coverage. Also, stay tuned to Strafe's YouTube channel for exclusive interviews, press conferences, and more.
Featured Image Credit: Valve