Shadow Words to Golems: Dota 2 Warlock Guide
Warlock wins fights by making the enemy team pay for grouping up. His spells scale with numbers, not targets, so one good cast can swing a full 5v5. This Dota 2 Warlock guide explains his role, how his abilities work, how to level them, what items fit his needs, and how to take clean teamfights with strong positioning.
Who is Warlock?
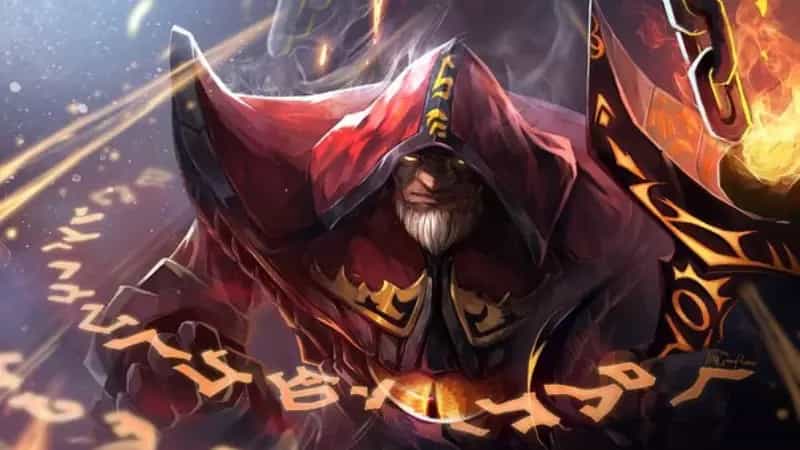
Demnok Lannik is Chief Curator and Head of Acquisitions for the Arcane Archives of the Ultimyr Academy. He became the most powerful Warlock in the academy through obsessive study, then carved a staff of Dreadwood and bound a spirit from the Outer Hells into it.
In-game, Warlock fills Support, Initiator, and Disabler roles. He brings healing, teamfight control, and a spell-immunity-piercing stun through his ultimate.
Overview
Warlock plays best as a position 4 support. He helps his lane with Shadow Word, then shifts into teamfight control with Fatal Bonds and Chaotic Offering.
He depends on positioning. He has no escape tool, long cast animations on most spells, and long cooldowns on key abilities. His cast ranges are strong, so he can affect fights from a safer spot if he sets up early.
Strengths and weaknesses
Warlock is strongest when both teams group up. His kit rewards clumped enemies and planned fights.
He struggles when he gets jumped first. Low armor and no escape means poor positioning often ends the fight before it starts.
Abilities Explained
![]()
Fatal Bonds (Q)
Fatal Bonds binds several enemy units together. When one bonded unit takes damage, the others take a percentage of that damage as well.
The link does not care about distance after it applies. Once enemies are bonded, they keep sharing damage even if they spread out.
A key detail: the shared damage keeps the same type as the source damage. Physical stays physical, magical stays magical, and pure stays pure. It also interacts with common on-damage rules like disabling Blink Dagger.
Fatal Bonds can stack. If you cast it again, the new instance works independently. That matters in long fights or when you refresh spells later.
Fatal Bonds also creates Minor Imps from enemy units that die while bonded. Each death spawns an imp with its own duration. Imps automatically seek nearby targets, prioritizing bonded heroes, and explode when they reach them.
Aghanim’s Shard upgrades the imps by increasing their power.
Shadow Word (W)
Shadow Word heals a friendly unit over time or damages an enemy unit over time. It ticks once per second for 10 seconds.
Use it early. It heals a lot over the full duration, but it does not save someone who is already about to die to burst damage unless you cast it before the burst lands.
Shadow Word stacks on repeated casts. That makes it strong for sustained fights and for keeping a frontliner healthy while you set up spells.
Later in the game, the damage side often matters less than the heal. Use it to keep core heroes fighting and to keep your golem alive longer.
Upheaval (E)
Upheaval is a channeled area spell that slows enemies more and more the longer you channel it. It also deals magical damage per second that ramps up as the channel continues.
The most important rule: Upheaval’s strength depends on how long you channel, not how long an enemy stands inside it. Channel time drives the slow and damage growth.
Enemies keep the slow for 3 seconds after leaving the area or when the spell ends. That lingering slow helps your team chase after the channel finishes.
Upheaval is strongest when you cast it where enemies want to move, not where they already stand. If you drop it directly on top of a target with no setup, they often walk out before it ramps.
Aghanim’s Shard adds imp spawns while channeling. It spawns an imp every 2 seconds based on the current level of Fatal Bonds. It does not require Fatal Bonds to be learned to spawn imps.
Chaotic Offering (R)
Chaotic Offering summons a Warlock Golem and stuns enemies in the impact area. The stun pierces debuff immunity, which makes it reliable even into spell immunity.
The golem lasts 60 seconds and arrives with Permanent Immolation and Flaming Fists.
Permanent Immolation is an aura that burns nearby enemies for magical damage each second. Flaming Fists adds extra pure damage in an area around the attack target when the golem attacks. Both effects reward enemies who stay grouped.
Chaotic Offering has a long cooldown. Treat it as a fight-defining tool, not something to toss out for small trades unless that trade leads into an objective.
Aghanim’s Scepter summons two golems with reduced stats and bounty, with the second arriving shortly after the first. Each arrival applies the stun and destroys trees in the area.
Talents That Change How You Play
Warlock’s talents can shift how you take fights.
At level 10, Upheaval radius helps you control more space, while Fatal Bonds damage increases the punishment when enemies share damage.
At level 15, Shadow Word heal/damage increases your sustain and lane impact, while the ally attack speed option ties your channel to a team buff.
At level 20, Shadow Word can turn into an area-targeted spell through the AoE talent. That changes how you apply it and how you position when casting.
At level 25, golem durability becomes a major lever. Armor or high magic resistance for golems affects how long they stay alive, which affects how long Permanent Immolation and Flaming Fists stay in the fight.
Skill Build
![]()
Most support builds prioritize Shadow Word and Fatal Bonds first. These two spells do the most consistent work in lane and early fights.
Upheaval often starts as a value point if you need a disable early. It becomes more valuable as you get more levels, since the ramp and the maximum channel time improve with rank.
Chaotic Offering should be leveled whenever available. It is your main teamfight swing.
How to Lane as Warlock
Warlock’s lane plan is simple: keep your partner alive, trade efficiently, and avoid getting caught.
Shadow Word makes trading easier because it turns small health leads into lasting pressure. Cast it early in an exchange so the full duration matters.
Fatal Bonds can turn a creep wave into free damage when enemies stand close to creeps. Use it when heroes clump near lane creeps, so shared damage amplifies every hit your lane partner lands.
Warlock has long cast animations on most spells. Start casts from safe angles and do not wait until the enemy is already on top of you.
Teamfight Plan and Spell Order

Warlock shines in planned fights. He punishes enemies who group and slows their retreat so your team can finish kills.
A standard counter-initiation pattern looks like this:
Chaotic Offering lands the stun and drops the golem into the fight. Fatal Bonds then links the clump so your team’s damage spreads. Upheaval follows to lock movement and stop escapes while the golem burns everyone nearby.
This order works because the stun buys time for Upheaval to ramp. Fatal Bonds makes every bit of damage count, including damage from allied spells and attacks.
Positioning rules that keep you alive
Stand far enough back that the enemy cannot cancel your channel for free. Use terrain, trees, and high ground when you can.
Cast Shadow Word on yourself before channeling if you expect return damage. It adds sustain during the vulnerable channel window.
Keep a Town Portal Scroll ready. Warlock flips fights, so arriving early matters.
Golem Control and Fight Value
Your golem is a damage source and a zone tool. Keep it near heroes to maximize Permanent Immolation uptime. Do not waste time stopping to attack a fleeing hero if you can keep the golem close enough for the burn to finish the kill.
Do not donate the golem bounty. If the fight ends and the golem will die anyway, pull it back. If it must die, dying to creeps or towers is better than giving an enemy hero the last hit.
Shadow Word can be cast on the golem. That keeps it alive longer, which usually means more total damage and more control.
Permanent Immolation from multiple golems stacks. If you have ways to summon more than one golem, keeping them in the center of the fight becomes the main job.
Item Build for Support Warlock

Warlock needs mana, positioning tools, and team utility. He does not need damage items to be effective.
Starting items
-
Tango, Healing Salve, Clarity, Iron Branch, and Observer Wards help you survive lane and keep casting.
Early game
-
Magic Stick and Boots of Speed help you survive trades and reposition to cast.
-
Urn of Shadows adds sustain and value during skirmishes.
Mid game
-
Magic Wand upgrades your burst sustain.
-
Arcane Boots keeps your team active on the map.
-
Glimmer Cape helps you survive and can protect you while channeling Upheaval.
-
Force Staff fixes positioning problems and can also help your golem stay on top of targets.
Late game
-
Refresher Orb doubles your fight impact by letting you cast key spells again.
-
Octarine Core reduces cooldowns and adds spell lifesteal from abilities like Fatal Bonds and Shadow Word.
Situational options
-
Ghost Scepter protects you from physical burst.
-
Solar Crest helps allies and can be used to boost a golem or pressure a target.
-
Drum of Endurance adds stats and helps your team move and hit faster.
-
Eul’s Scepter of Divinity adds movement speed, mana sustain, and a self-save option.
-
Lotus Orb adds armor and dispel utility with a reflection shield.
-
Scythe of Vyse gives a reliable long-range disable.
-
Guardian Greaves upgrades sustain and provides a self-dispel to remove silences that stop your casting.
Common Mistakes to Avoid
Warlock players often lose fights before they cast spells. The fix is simple: plan your spot before the fight starts.
Do not hold Chaotic Offering too long. If the enemy commits and clusters, cast it. A late ultimate often means the fight is already gone.
Do not channel Upheaval where enemies can ignore it. Place it on routes, choke points, and retreat paths so they have to choose between bad options.
Do not cast Fatal Bonds into a wave when you need it for heroes. Bonds on creeps can still help, but bonding heroes during a clump is the real swing.
Final Takeaway

Warlock wins by being early, safe, and decisive. Set your position, land Chaotic Offering on a clump, bind targets, and channel Upheaval where escape paths collapse. If you do that consistently, teamfights start to feel predictable, and Warlock becomes a steady win condition instead of a coin flip.
Don't forget to check out Strafe Esports for all the latest Dota 2 news and our X account for the latest content and coverage.
Featured Image Credit: Dota 2 Fandom