Valorant Pearl Map Overview – Key Tactics and Map Insights
Overview of the Pearl Map in Valorant
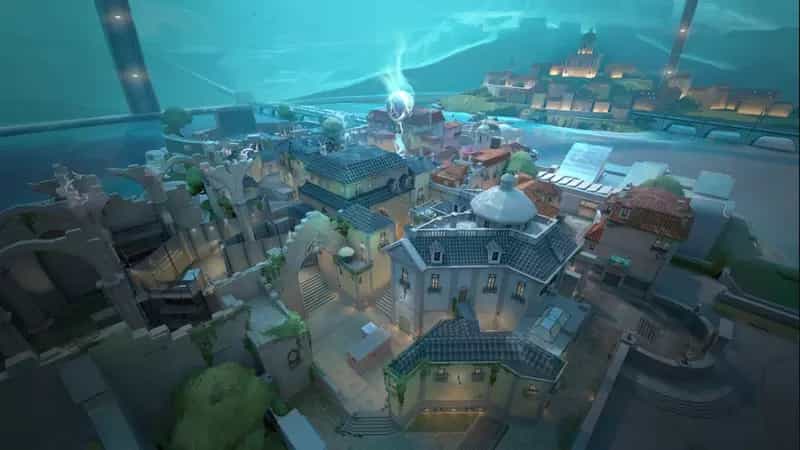
Pearl is a unique map in Valorant, taking players to an underwater city set in an alternate version of Lisbon, Portugal. Unlike other Valorant maps that include dynamic elements or mechanical hooks, Pearl is a simpler, straightforward map with two bomb sites (A and B) and a traditional three-lane structure. This design makes it ideal for players who appreciate tactical, balanced gameplay where positioning, map control, and teamwork shine.
Released in June 2022, Pearl brings new strategic challenges through its tight corners, open areas, and a blend of close and long-range sightlines. As the first map set on Omega Earth, Pearl also holds significance in Valorant’s lore, featuring a city encapsulated in a geodesic dome to protect it from the rising Atlantic tides, offering an immersive narrative backdrop to intense battles.
Pearl Map Layout and Key Areas
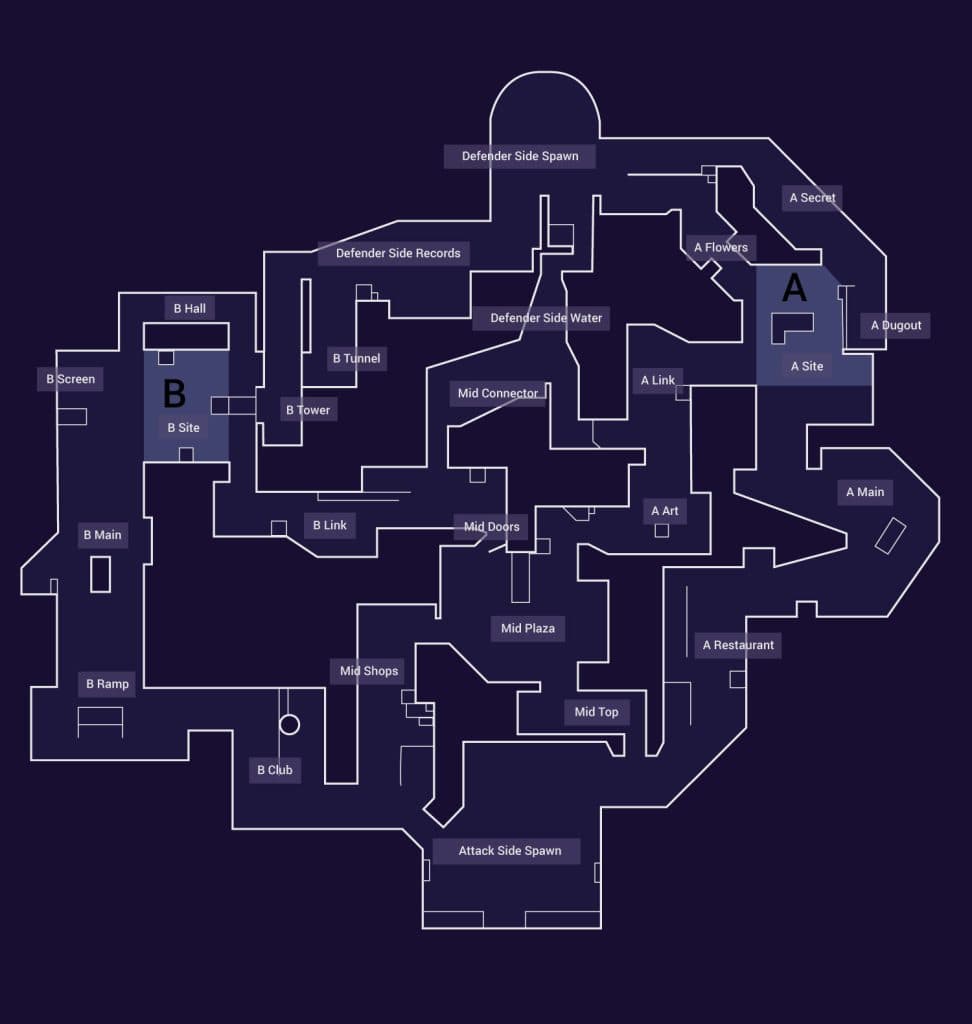
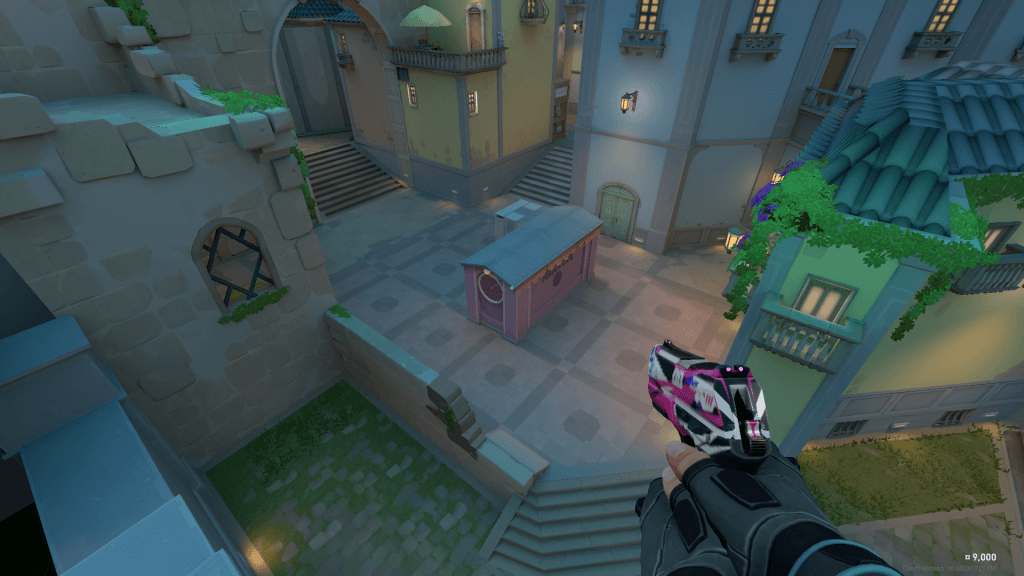
A Site
A Site offers several access points, making it more favorable for attackers. This area includes the key zones of Dugout, Secret, and Flowers, which provide tactical advantages. For attackers, controlling the A Site involves moving through A Main and using the restaurant near A Site as a staging point. Smokers like Viper can block sightlines in Tower and Secret, while Duelists such as Jett or Raze can initiate and take control.
Defenders must maintain strong positioning in these areas. A balanced setup involves keeping an eye on multiple entry points, as attackers can overwhelm isolated players quickly. Efficient utility management is critical, as the attackers’ diverse access points require defenders to watch multiple angles. A well-coordinated team can leverage Secret and Tower to stage effective retakes, using utility like flashes or stuns to neutralize attackers holding post-plant positions.
B Site
Unlike A Site, B Site favors defenders with its longer sightlines and elevated positions. B Site includes areas like B Main and B Tower, which are ideal for defensive players who excel in holding long angles. Killjoy, for instance, can lock down this area using her turret and alarm bot to secure B Main, while an Operator-wielding Chamber or Jett can use the vantage points in B Tower to hold long lines of sight against attackers.
Attackers approaching B Site need to carefully use utility to clear these high-traffic defensive spots. Smokes and flashes are essential to disorient defenders positioned in the B Tower or near B Hall. Placing the spike behind the screen at B Site provides cover from B Link and Main, creating safer angles for attackers to hold post-plant positions. For retakes, defenders can rely on B Link and Hall for safer entry rather than pushing through the more exposed B Main.
Mid Control and Strategy
The mid area in Pearl is crucial for map control, as it enables players to rotate between A and B Sites. Mid is divided into areas like Mid Plaza and Mid Connector, both essential for flexible play. Controlling mid grants attackers the advantage of unpredictable rotation options, allowing them to split-push or quickly overwhelm a site with reinforced numbers.
To hold mid, Controllers like Omen or Harbor can use smokes to block sightlines in the Mid Plaza and Tower. Teams that control mid also have the freedom to pressure multiple points simultaneously, challenging defenders and spreading their resources thin. Successful mid control demands strong communication and constant vigilance, as attackers can quickly flank through this area if left unchecked. Defenders might use a Sentinel like Cypher to place traps in mid, deterring pushes and gaining crucial intel.
Attack Strategies for Pearl

Approaching A Site
A Site requires a tactical approach due to its interconnected pathways. Attackers aiming for A Site should first secure areas like Art Gallery and Dugout. Initiators such as Fade or Skye can clear out Dugout and A Main with abilities that reveal enemy positions. Setting up smokes in Tower and Secret gives attackers safer entry, while a Duelist pushes through A Main to engage defenders head-on.
Ideal plant locations for A Site include behind boxes near Dugout, which provides cover and forces defenders into predictable retake paths. Post-plant, players can position one player in Dugout to watch the cross, with another covering flanks from Art. This setup secures the site and keeps defenders at bay, allowing attackers to react based on defender positioning.
Tackling B Site
The best approach for B Site on Pearl is through controlled, calculated pushes. Attackers must first secure B Main by smoking off areas like Tower and Hall. Initiators are crucial here to clear corners and make space for teammates to advance safely. A solid planting spot behind the screen in B Site offers cover and multiple sightlines, enhancing control over post-plant situations.
To secure the site post-plant, attackers can assign one player to hold the cross from B Main while another covers B Link. This positioning forms a defensive crossfire that makes retake attempts from defenders more challenging. If attackers have mid control, consider an open plant that covers Water or Mid to capitalize on crossfire opportunities.
Gaining Control of Mid
Controlling mid is essential for flexible execution on Pearl, as it allows attackers to support either site at a moment’s notice. Controllers can block Mid Towers to establish control, while an Initiator clears any immediate threats. Once secure, mid allows attackers to create pressure on defenders, splitting their focus between A and B Sites.
Using mid control effectively requires coordination. Attackers can rotate through Water to execute a surprise push on B Site or split between A Site’s Main and Art Gallery. A lurker in Water or Art can also create distraction, catching defenders off-guard and providing critical openings for the main attack force.
Defensive Strategies for Pearl
Defending A Site
Defending A Site demands an active strategy due to multiple entry points. Positioning is crucial; players can hold close angles in Tower or Secret, while another player monitors the push from A Main. Rotating through Art to assist teammates can also help defenders maintain control over A Site.
For retakes, defenders should coordinate pushes from Secret and Art, trapping attackers from multiple angles. Holding some utility for retakes, such as flashes or molotovs, provides defenders with essential tools to regain control of the site and disrupt attackers holding post-plant positions.
Defending B Site
B Site defense benefits from vertical play, using areas like B Tower for elevated sightlines. Assigning a player to B Main while another patrols Link and Hall helps defenders create an overlapping field of view that covers multiple entry points. Sentinels like Killjoy or Cypher are ideal for locking down this site with traps, forcing attackers to use utility early.
During retakes, prioritize entering through B Link or Hall instead of B Main, which offers more favorable angles and reduces exposure. B Site’s screen area provides valuable cover, which defenders can use to their advantage when repositioning or stalling attackers.
Mid Defense Tactics
Mid defense on Pearl doesn’t require constant presence but should vary to keep attackers guessing. Defenders can use utility early in the round to secure Mid Plaza, then fall back to safer positions. Aggressive pushes through mid should be used sparingly to disrupt attacker strategies and keep mid control unpredictable.
Sentinels like Cypher or Killjoy can leave traps in mid to alert teammates of an enemy push, allowing defenders to quickly reposition and counter. Mid control is essential for efficient rotations between sites, and defenders should aim to maintain a balance between mid and site control to prevent attackers from overwhelming either site.
Recommended Agent Selection for Pearl
Pearl’s layout requires a balanced team composition to navigate its varied terrain. Controllers such as Viper and Harbor are valuable for blocking sightlines, making them essential for both attack and defense. Viper’s wall can help secure mid or block access to specific areas of each site, while Harbor’s Cove can shield teammates during plant or retake situations.
Sentinels like Killjoy or Cypher are well-suited for securing sites with traps and gadgets, particularly effective for defending corners and tight angles. Duelists like Jett thrive in Pearl’s open spaces, using her agility to navigate the map effectively, while Initiators like KAY/O or Fade provide reconnaissance and utility to support team pushes and retakes.
Adaptability is crucial on Pearl. Effective agent choices can make a significant difference in securing key areas, enabling teams to control the map dynamically and react to the ever-changing flow of each round. By focusing on strategic mid control, coordinated site pushes, and strong post-plant setups, teams can develop a balanced approach that maximizes their chances of success on Pearl.
Check out Strafe Esports for all the latest VALORANT news and our X account for the latest content and coverages. Also, stay tuned to Strafe YouTube for exclusive interviews, press conferences, and more.
Featured Image Credit: Riot Games
Read More: